
Multi-factor authentication (MFA) adds an extra layer of protection to your website login. In addition to your username and password, you confirm it is really you with a six-digit code from an app on your phone, or with your fingerprint or face on a device you have registered.
This means that if someone obtains your password, they still cannot log into your account.
Each person with access should have their own website login. If your organization currently shares an account, contact interGen support before setting up MFA.
In the screenshots below, the red outline shows what to click or fill in next. Numbers show the order when there is more than one step on a screen.
Before You Start
You will need an authenticator app that can generate verification codes. Common options include:
- Google Authenticator
- Microsoft Authenticator
- Authy
- A password manager that supports verification codes (1Password, Bitwarden, and others)
If you already use one of these for another account, you can use the same app for your website.
Tip: Google Authenticator and Microsoft Authenticator can back up your codes to your Google or Microsoft account. Turn this on in the app so your codes come with you if you replace your phone.
Set Up MFA
1. Log into your website
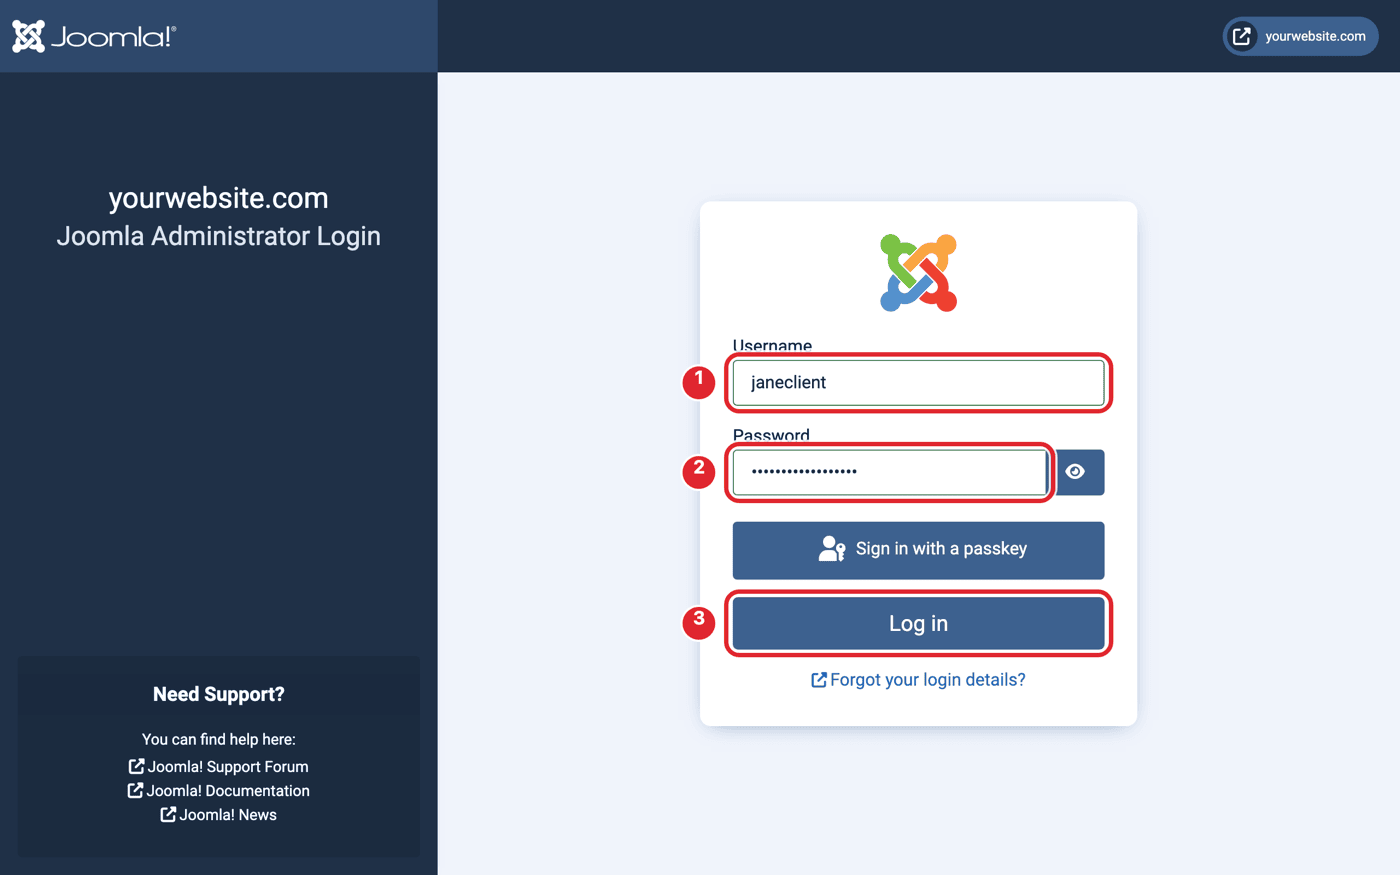
Go to your website’s administrator login: https://yourwebsite.com/administrator
Enter your username and password, then select Log in.
2. Open your account settings
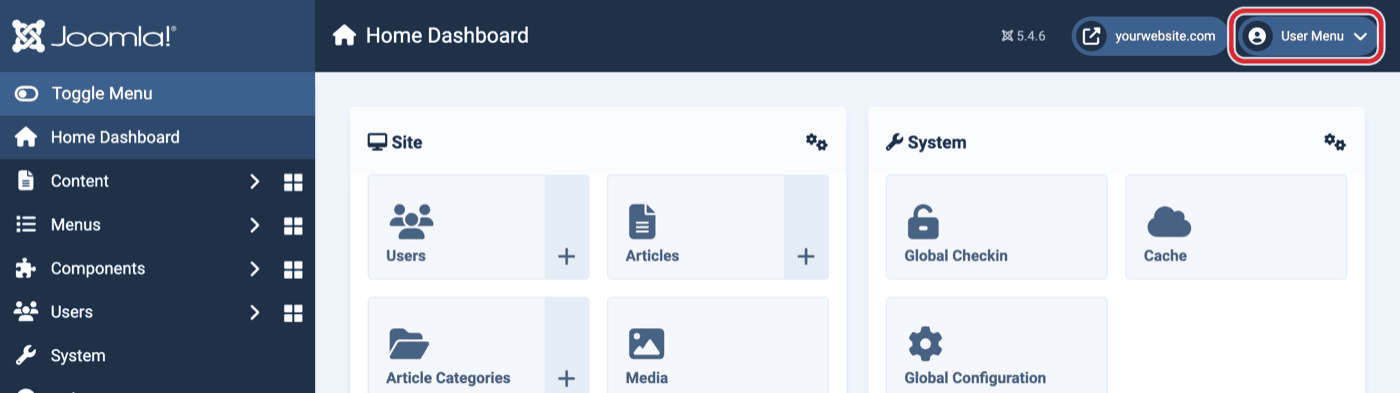
In the upper-right corner, select User Menu.
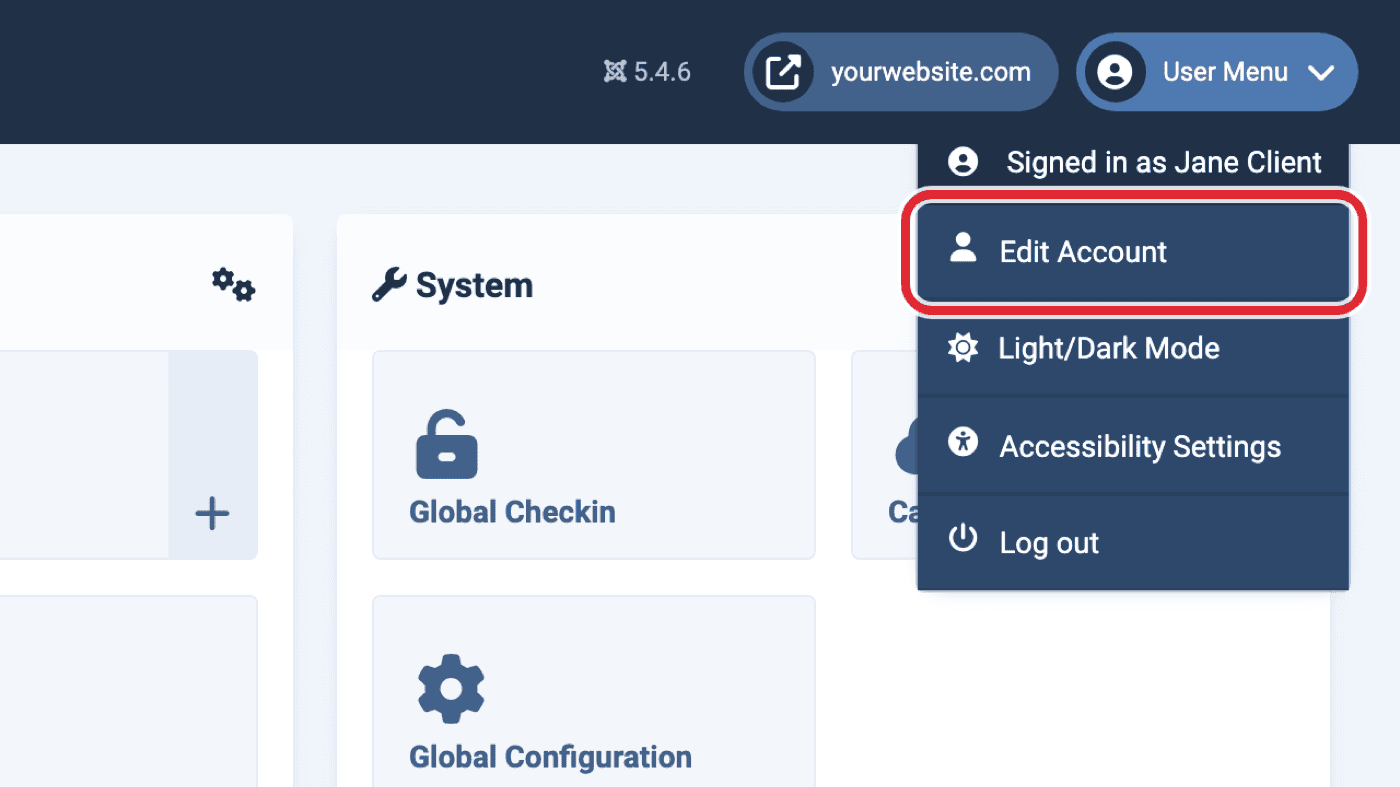
Select Edit Account.
Open the Multi-factor Authentication tab.
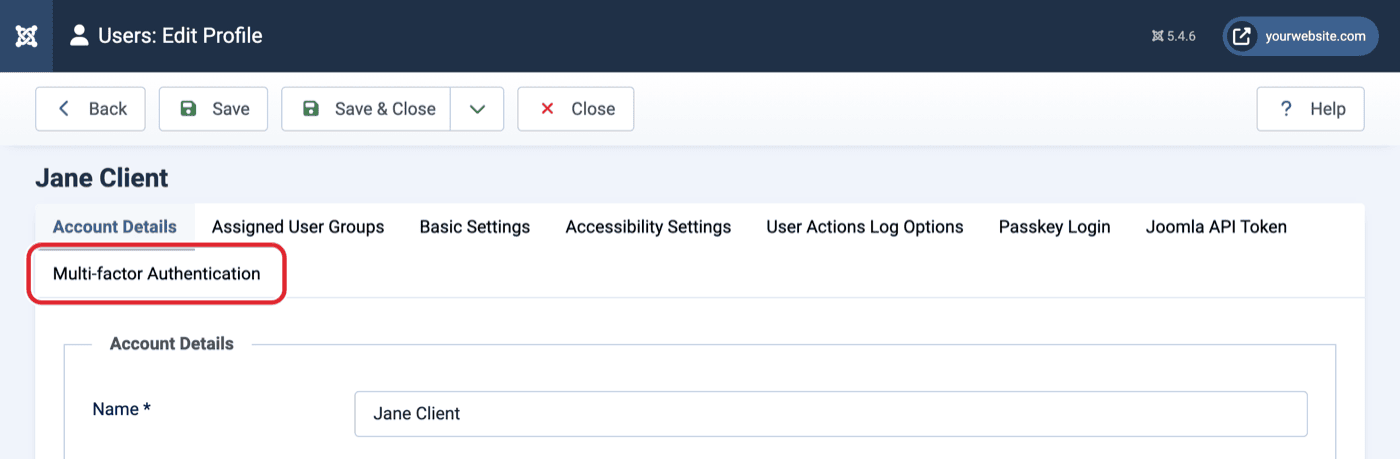
MFA can only be set up by the person who owns the account. Another administrator cannot set it up on your behalf.
3. Add a verification code
Under Verification code, select Add a new Verification code.
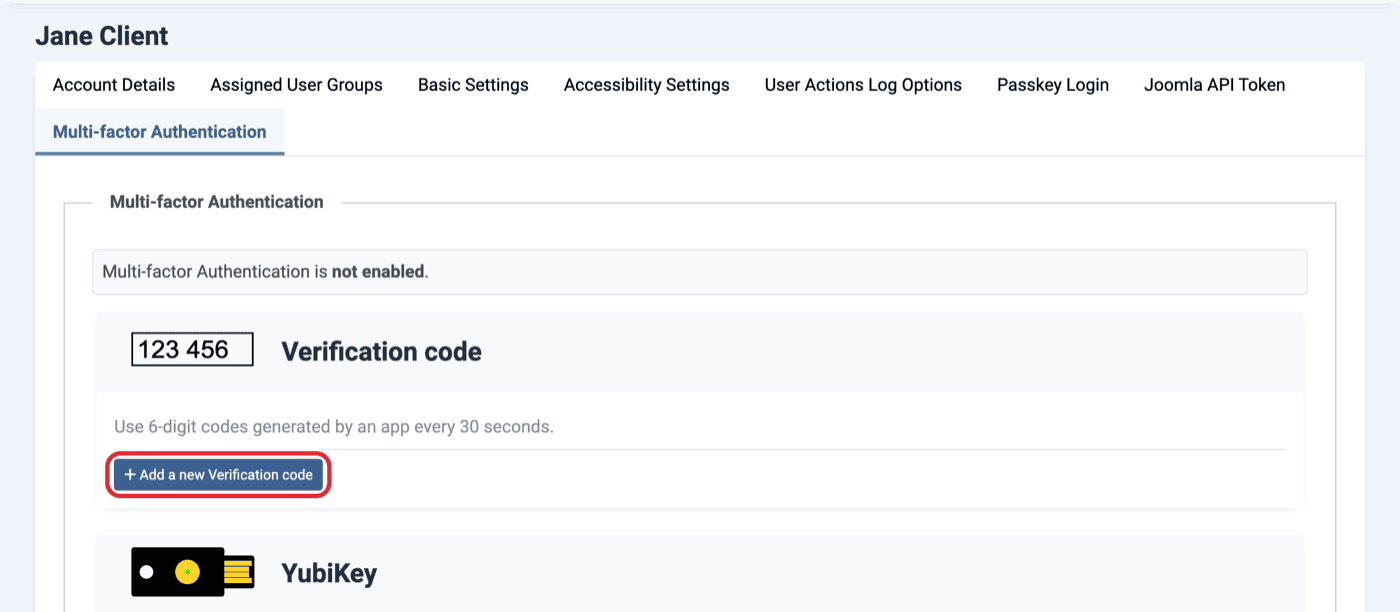
4. Scan the QR code with your authenticator app
Open your authenticator app on your phone and choose the option to add a new account (in Google Authenticator, tap + and then Scan a QR code). Point your phone at the QR code on your screen.
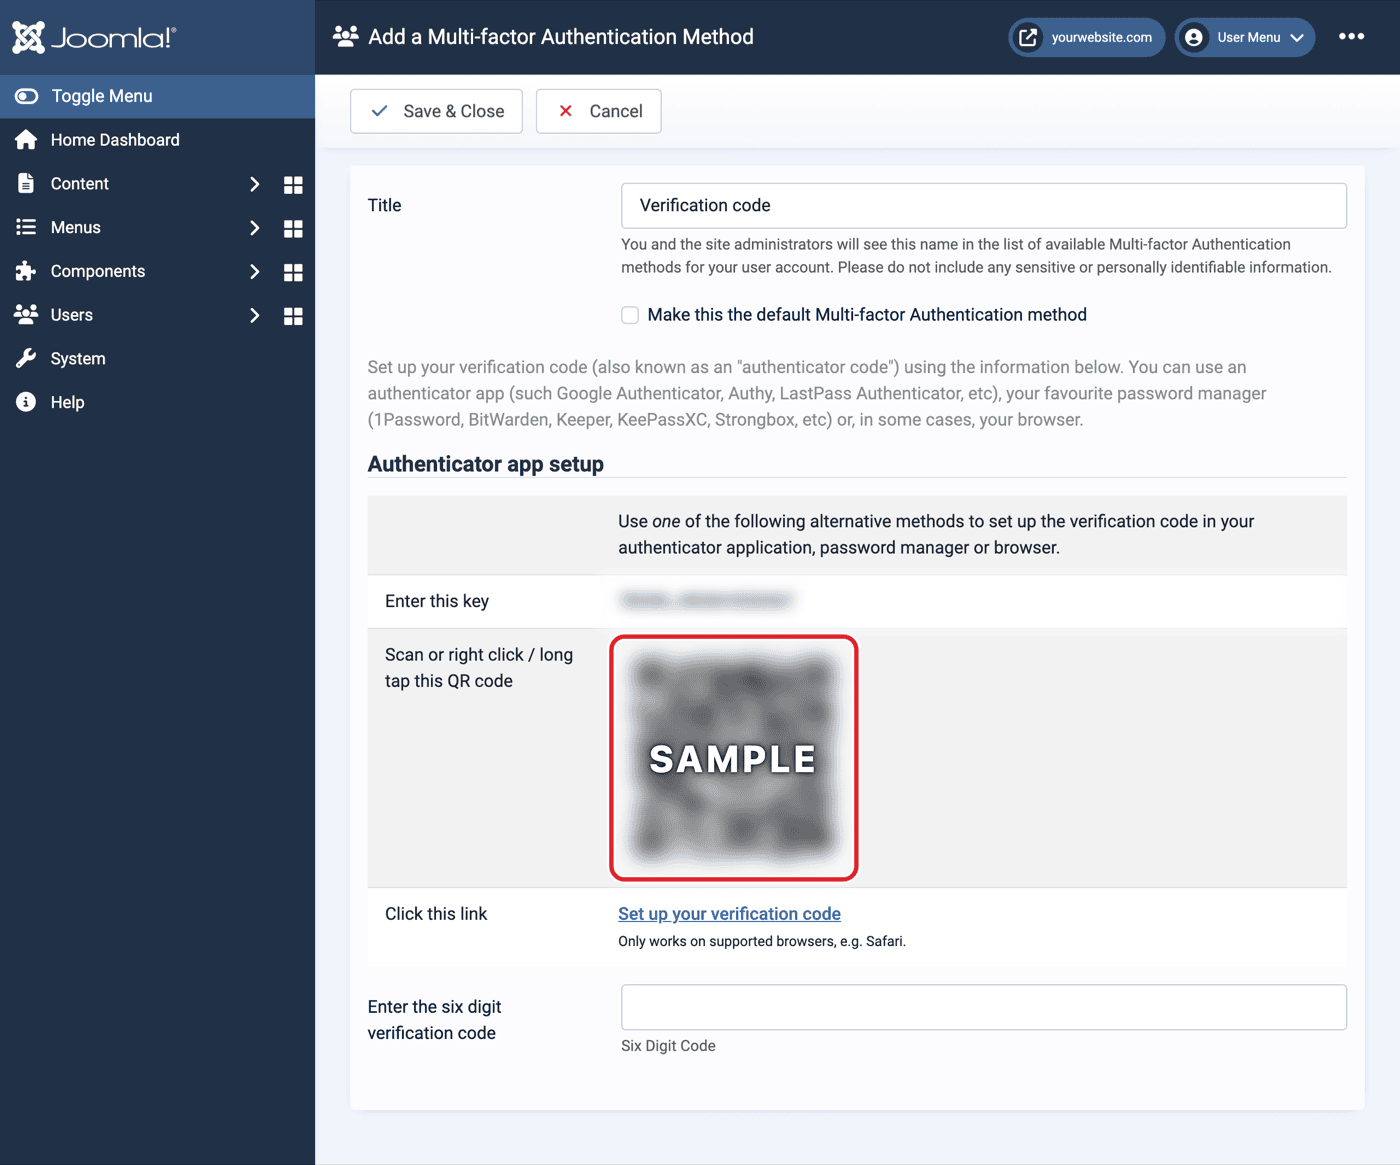
Your app will start showing a six-digit code for your website. The code changes every 30 seconds.
5. Enter the code and save
Type the current six-digit code from your app into the Enter the six digit verification code box (1), then select Save & Close (2). If the code changes before you finish, just use the new one.
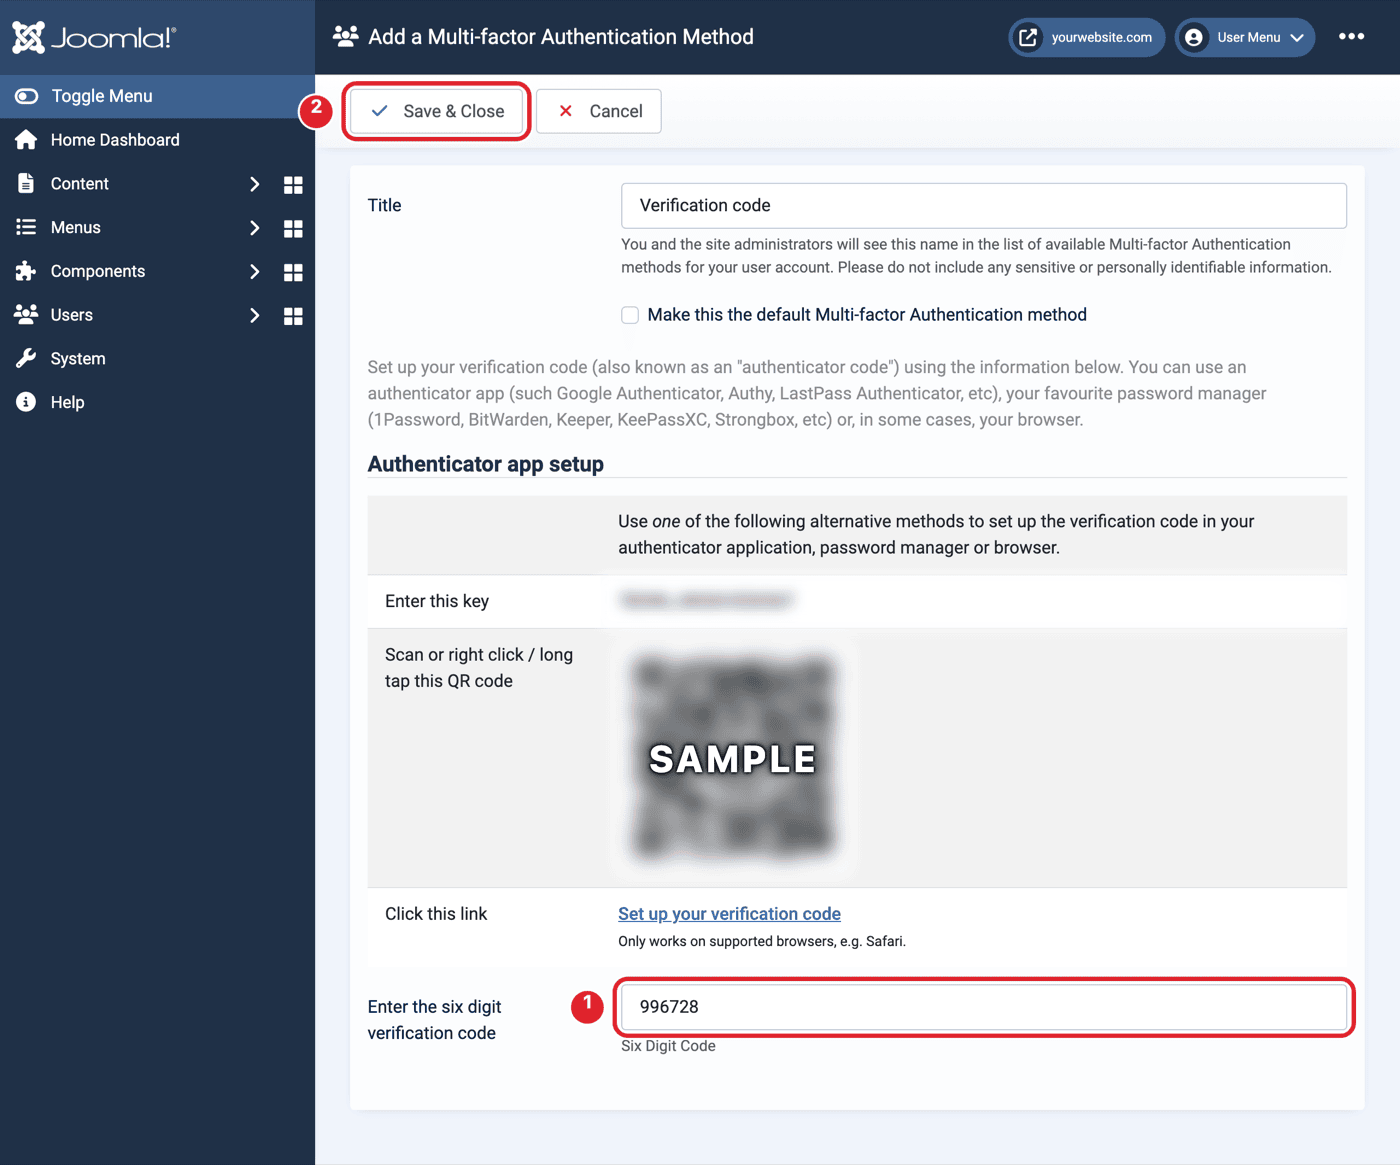
MFA is now enabled for your account.
Save Your Backup Codes
When MFA is turned on, Joomla creates a set of backup codes. Each one can be used once to log in if you cannot use your phone.
On the Multi-factor Authentication tab, select Print these codes.
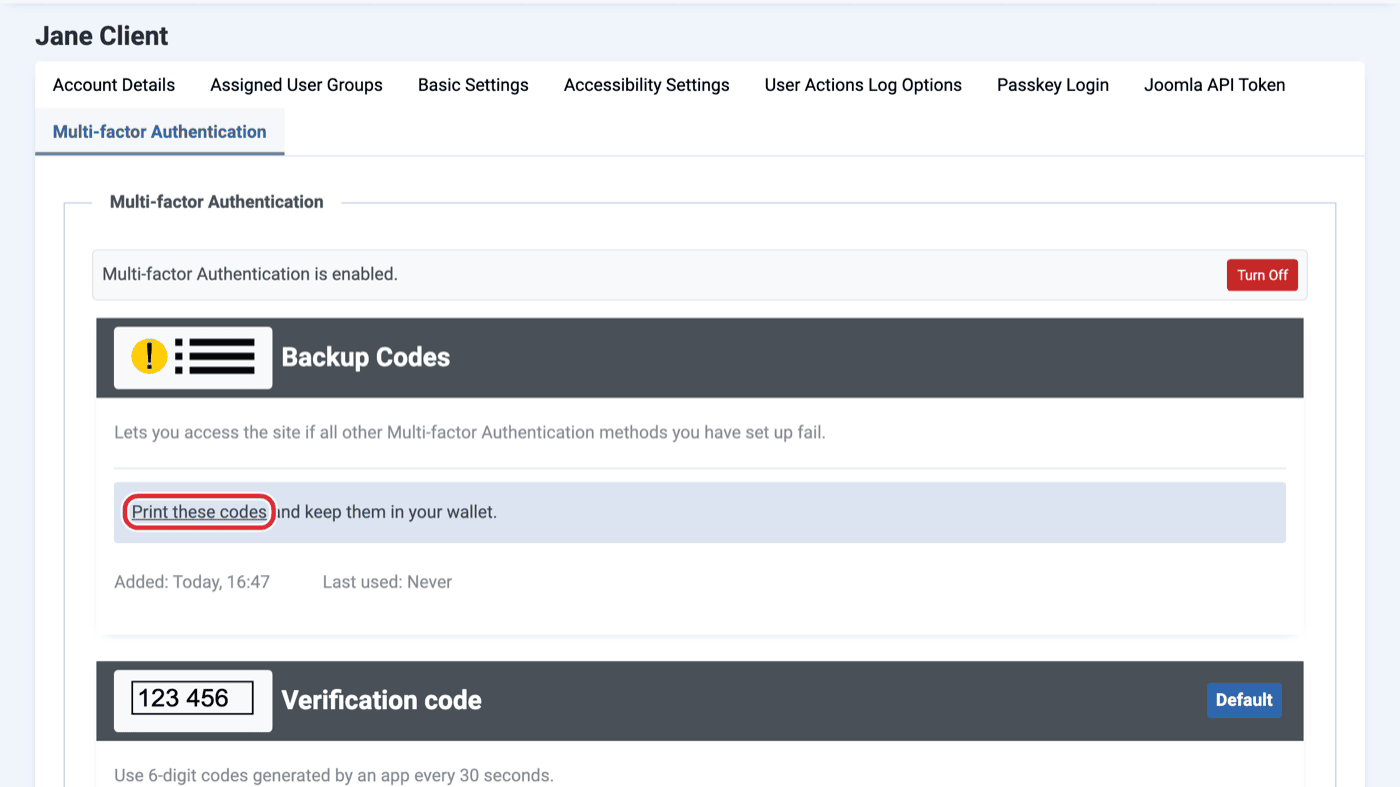
Print the codes or save them in your password manager.
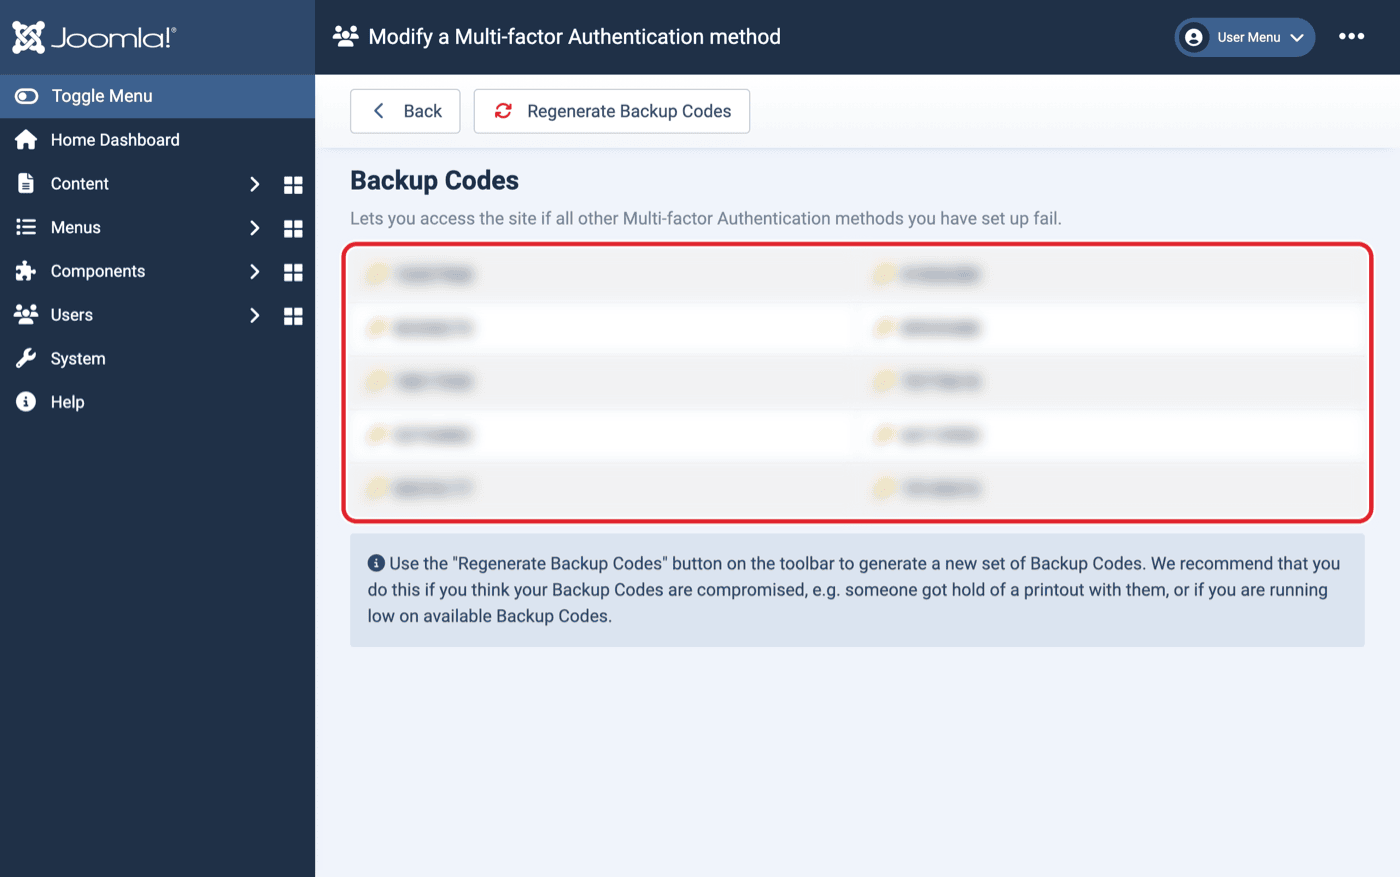
Store your backup codes somewhere secure and separate from your phone. Do not store them in the same place as your website password.
Optional: Add a Passkey (Fingerprint or Face)
If your computer or phone has a fingerprint reader or face recognition (for example Touch ID on a Mac, or Windows Hello), you can register it as a second way to confirm your login. This is quicker than typing a code, and your authenticator app stays available as a backup.
1. Add a new passkey
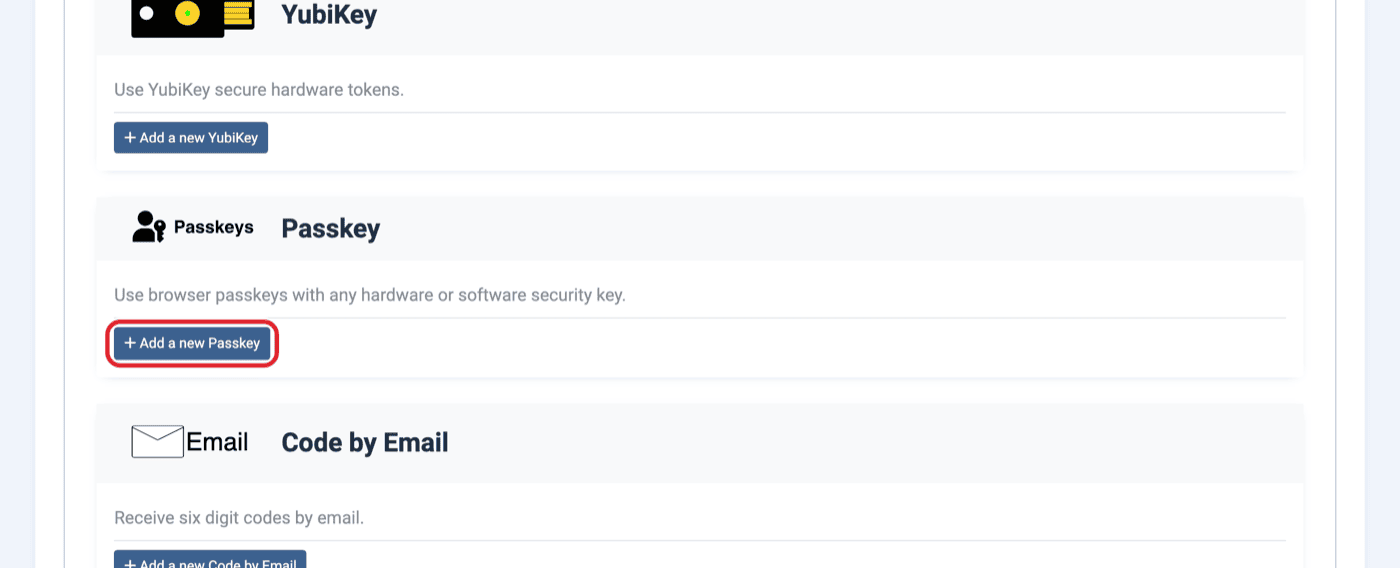
On the Multi-factor Authentication tab, under Passkey, select Add a new Passkey.
2. Name it and register
Give the passkey a name that tells you which device it is, such as “My MacBook” (1). Then select Register your passkey (2).
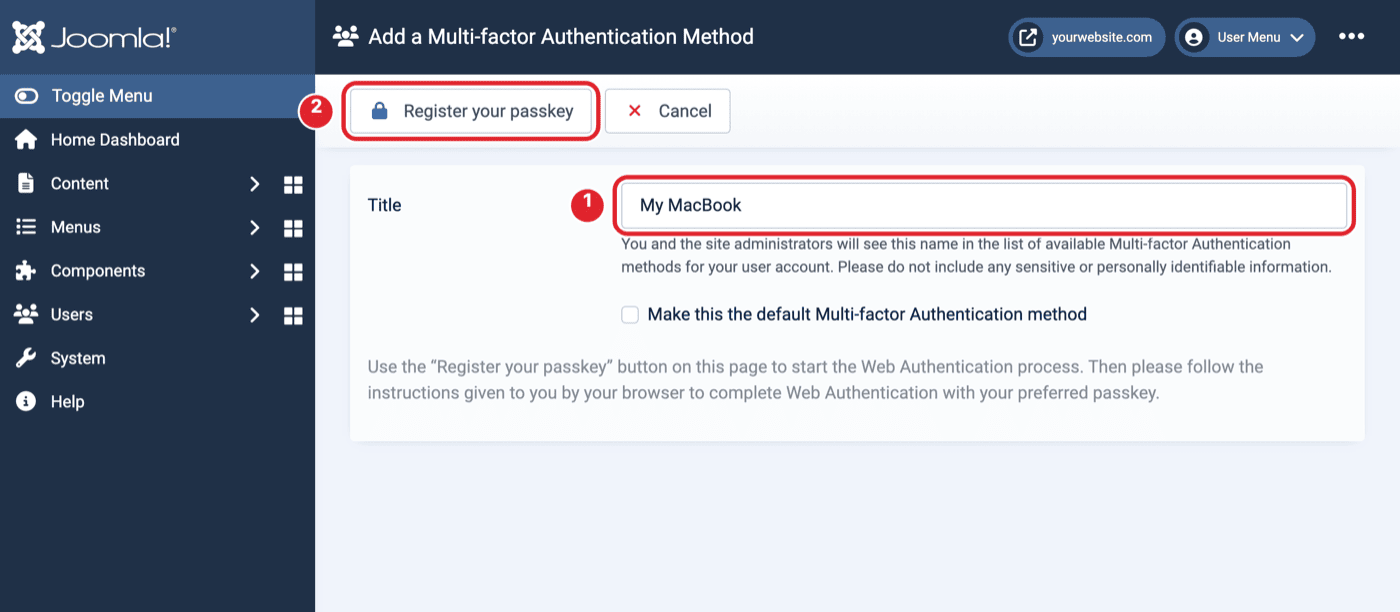
Your browser will ask where to save the passkey and ask you to touch the fingerprint sensor or look at the camera. Follow the prompts.
When you are done, your passkey appears in the list.
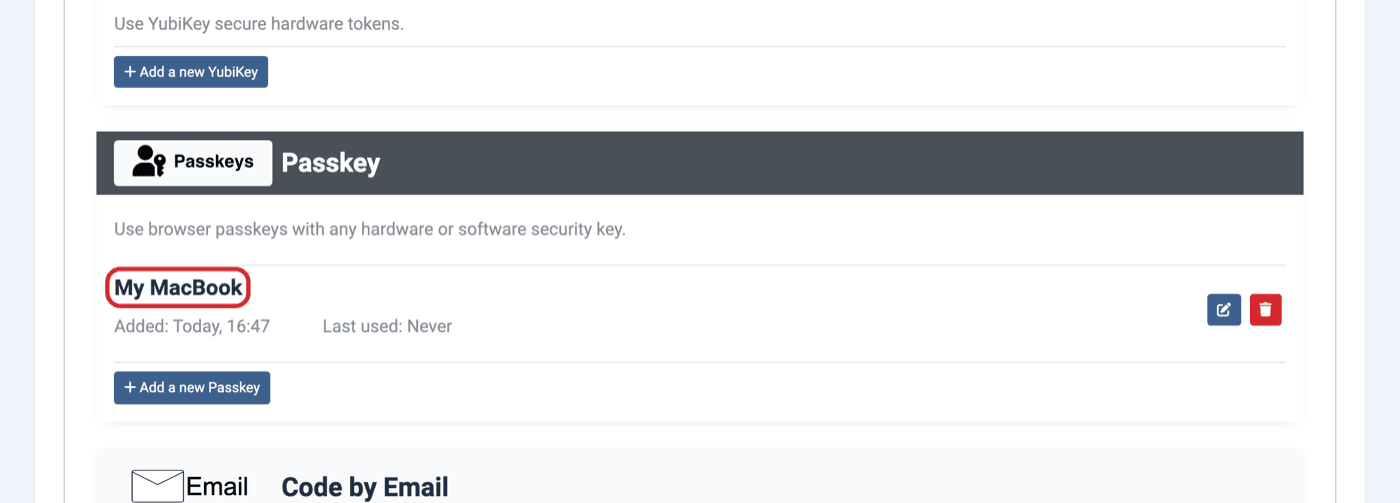
A passkey only works on the device, or the password manager account, where it was saved. Register a passkey on each computer you use, and keep your authenticator app set up for everywhere else.
What Changes When You Log In?
You will still enter your username and password as usual. After that, Joomla asks you to confirm it is you.
Using your authenticator app
Open your authenticator app, find the entry for your website, and type the current six-digit code into the box (1). Then select Validate (2).
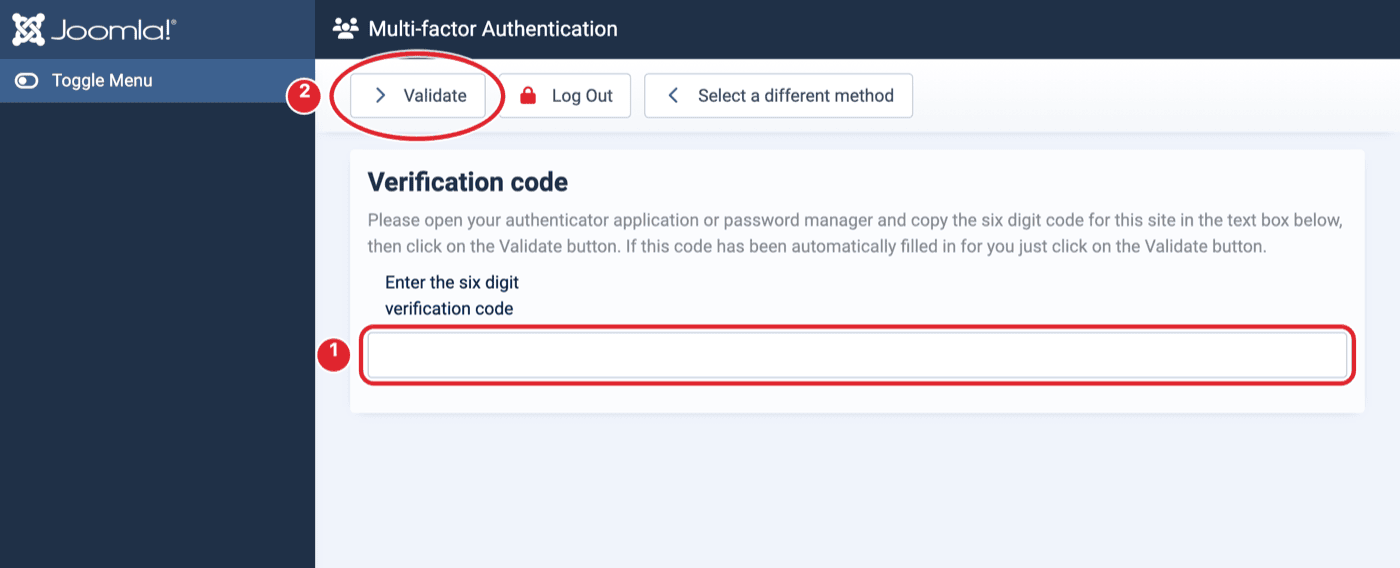
These codes change automatically, so you do not need to remember or save them.
Using a passkey
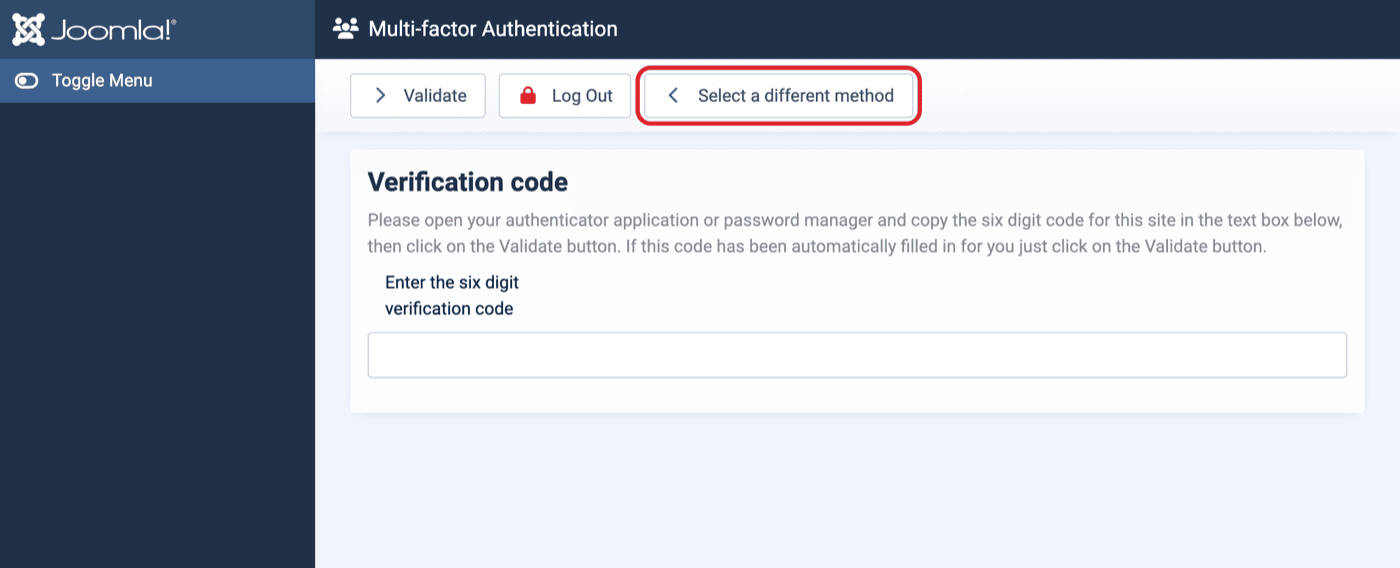
If you set up a passkey, select Select a different method.
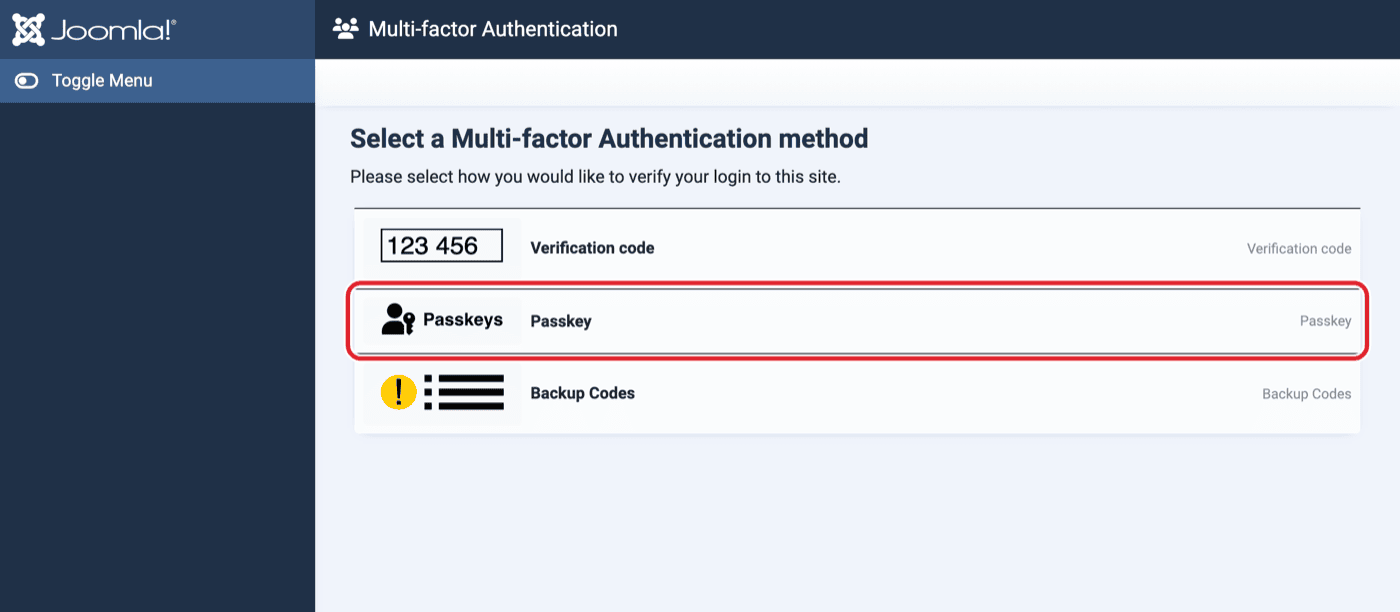
Select Passkey. (You can also choose Backup Codes here if you do not have your phone.)
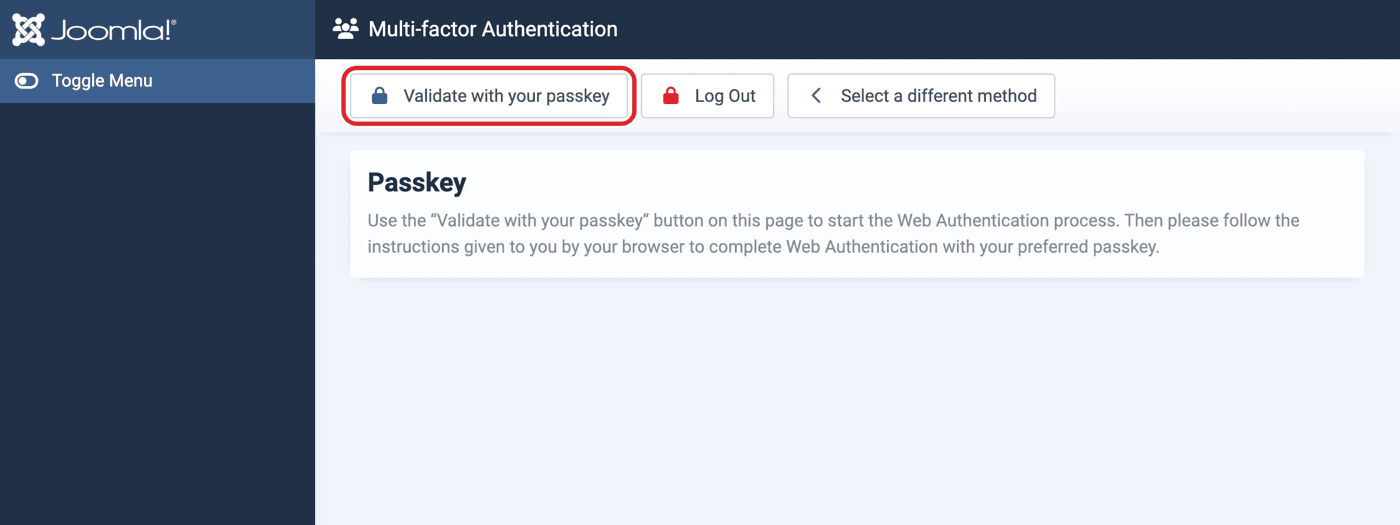
Select Validate with your passkey, then touch your fingerprint sensor or look at the camera when your browser asks.
Getting a New Phone?
Before removing or resetting your old phone, make sure your authenticator codes have moved to your new phone (most apps have a transfer or cloud backup option), or add another method such as a passkey to your account.
If you lose access to your authenticator and have no passkey or backup code available, you may be unable to log into your website.
Need Help?
If you have trouble setting up MFA or are unsure whether it is working correctly, contact interGen support at
Please do not send passwords, verification codes, QR codes, or backup codes by email.